Caution:Hot Dish
(mis)adventures in cooking
Tuesday, 19 April 2011
Easter Chai Vanilla Cupcakes with Vanilla Frosting
I always forget that I love the idea of making and decorating cupcakes more than the actual project when I get started! However, I was pretty impressed with the results of this little project. They tasted amazing, and I thought they looked pretty cute too given my lack of patience when it comes to decorating. Ever since I made my chai tea latte at home, I was thinking I could use the same method to make other chai tea flavored goodies, and cupcakes where the first thing that came to mind. I googled "best vanilla cupcake recipe" and decided to try this recipe posted on 52 cupcakes blog, amended slightly for the chai tea flavor, and used a buttercream icing recipe from my cupcake cookbook. The little chick decorated cupcake idea came from Paris Pastry's blog. Her's look wayyyy cuter but I gave it my best go at it!!
For those wondering where the name of blog came from, here is the inspiration!
PS. These are not Weight Watcher's friendly (if you really must know, 8 points!) Two of these killed my points counting this week, but one was definitely worth it! :)
Chai Tea Cupcakes (makes 24-30 cupcakes)
What you need:
1 3/4 cups cake flour, not self-rising
1 1/4 cups unbleached all-purpose flour
2 cups sugar
1 tablespoon baking powder
3/4 teaspoon salt
1 cup (2 sticks) unsalted butter, cut into 1-inch cubes
4 large eggs
1 cup whole milk
2 chai tea teabags
1 teaspoon pure vanilla extract
What to do:
1. Preheat oven to 325°. Line cupcake pans with paper liners and set aside. Add milk to saucepan or small pot on medium heat. When it comes to a simmer, add teabags and simmer on low heat for approximately 3 minutes. Remove from heat and wring out tea bags. You may need to top up the milk to measure 1 cup again.
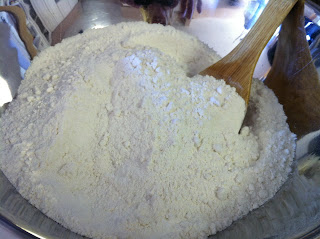
2. In a large bowl combine flours, sugar, baking powder, and salt; mix on low speed until combined (or can mix by hand if don't have a large stand mixer. I don't at home and really want one now!)
3. Mix butter with mixer into the dry ingredients until in less than pea sized pieces and coated with flour.
4. Whisk together eggs, milk, and vanilla. With mixer on medium speed, add wet ingredients in 3 parts, scraping down sides of bowl before each addition; beat until ingredients are incorporated but do not overbeat.
5. 3. Divide batter evenly among liners, filling about two-thirds full. Bake, rotating pan halfway through, until a cake tester inserted in the center comes out clean, 17 to 20 minutes.
6. Cool on a wire rack until completely cool before icing.
Vanilla Frosting (from Crazy about Cupcakes)
What you need:
3 cups confectioners' sugar
1/2 cup unsalted butter, at room temperature
2 teaspoons vanilla extract
2 tablespoons milk
What to do:
1. Gradually add the sugar to the softened butter and cream together with electric mixer.
2. Stir in the vanilla and milk and beat until smooth and slightly thick consistancy (you need thicker icing for the details when decorating)
3. I followed the directions for decorating from Paris Pastry's blog. I used ziploc bags for piping bags for the little bits of coloured icing (do be prepared, they busted a seam a couple times!) The yellow icing for the base, you'll need to thin a bit so it spreads easily. Just add a few drops of milk at a time so it doesn't get too runny.
4. Decorate until your little chicks are complete! I had a tube of candy kote in blue from a previous decorating project, so I used that for the eyes to simplify things.
5. The remainder of the cupcakes (for variety and lack of artistic ability), I piped with icing and decorted with chocolate mini eggs.
6. Share and enjoy!
Saturday, 16 April 2011
BST Panani and Bucketlist
In the span of a couple days this week, twice the question came up, "What's on your bucket list?" Naturally, I always have ideas in my head about what I'd like to do and see, projects to tackle, and new challenges to keep bettering myself. I decided that this question having come up twice in a couple days was a sign that perhaps was time I actually put this list in writing, so I thought about it while making some lunch the other day. And what better to have for lunch than my favorite kind of sandwich - a panini! My panini press is a fixture on my counter, right beside the coffee maker. I was looking for some new ideas to try and came across the idea to use the focaccia bread inside out so I gave that a try. It was a good day! Bucket list is now in writing, and came up with a new and improved panini idea (I liked it much better inside out as I usually find the focaccia gets to tough when put in the panini press the normal way). So, what is on your bucket list?
Cheryl's Bucket List
See Sydney Harbour
Stay in an over-water bungalow in Bora Bora
Visit The Netherlands (where my grandparents immigrated from)
Go to the Louvre in Paris and see the Eiffel Tower
Learn to make Hollandaise sauce
Go on a winery tour
Have my cake and eat it too
Learn how to golf
Learn to snowboard
Become a better listener
Master making Pad Thai
Visit Tuscany
Go to Carnival in Venice
Discover zero calorie cheesecake
Visit Hawaii
Finish my cross stitch I started 15 years ago
Skydive
Hike in the grand canyon
Organize all my digital photos
Visit NYC
Learn to take criticism
Learn to accept compliments
Sleep in a castle
Go to a NFL game
Go to the ballet
Make the grass greenest on my side of the fence
BST panini - Bacon, Spinach & Tomato
(okay, and some yummy mozzarella cheese!)
1. Slice open the focaccia and turn inside out to assemble, so the cut sides are outside to get buttered up for the grill, and the crispy outside doesn't get any crispier. Layer the bacon, cheese, tomato seasoned with pepper, and spinach. Add some mayo and/or pesto.
2. Butter (or brush with olive oil) the outside of your sandwich and place in panini press (I love my Griddler, but you can also do this in a frying pan with a heavy pan over your sandwich to help press it).
3. Your panini is done when the cheese starts to get all melty and is golden brown!
4. Eat and enjoy!
Wednesday, 13 April 2011
Black Bean Salad - 4 points
This is one of my favorite salads for summer and with spring in the air I had to make it for the first time in 2011. I've found a few variations on this salad I'd like to try, but this is the basic recipe. Leftovers are great, not only on their own, but I've used it on tacos, in taco salad, and on tostadas or nachos.
For Weight Watchers, 4 points for a 1/2 cup serving.
What you need:
1 can black beans, rinsed and drained
1 can whole kernel corn, drained
1/4 cup red onion, diced
1 jalapeno pepper, seeded and minced
1/2 cup red bell pepper, chopped
1 avocado - peeled, pitted, and diced
2 tomatoes, seeded and chopped
1/2 cup chopped fresh cilantro
1 lime, juiced
2 cloves garlic, minced
1/2 teaspoon garlic salt
2 tablespoons olive oil
2 tablespoons red wine vinegar
1-2 teaspoons Italian seasoning or herb mix
(in place of oil, vinegar, and herbs, you can substitute 1/3 cup Italian dressing)
What to do:
1. To mixing bowl add black beans, corn, onion, tomato and pepper.
2. Add jalapeno pepper (can do 2 if you like more spice), garlic, garlic salt and herbs (if using).
3. Add olive oil and vinegar (or Italian dressing) and fresh squeezed lime.
4. Add cilantro and mix.
5. Serve and top with avocado (the avocado doesn't keep well and goes mushy in the leftovers, so I just prefer to add it when serving). Enjoy!
Sunday, 10 April 2011
Greek Style Potatoes - 5 points
Trying to recreate a potato found at my favorite Greek restaurants. The result was pretty close!
What you need:
6 medium potatoes, peeled and quarted (or in my case, 4 large potatoes)
2 cups chicken stock
3 cloves garlic
2 tablespoons olive oil
1 lemon
rosemary, thyme, oregano
salt and pepper
What to do:
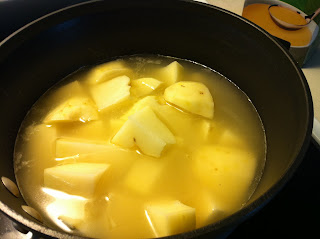
1. Boil potatoes in chicken stock, with 2 cloves of garlic, until nearly cooked through.
2. Transfer potatoes and garlic to a baking dish, with about 1/4 cup of stock that the potatoes were cooked in. Add one more clove of minced garlic.
3. Add olive oil and the juice of one lemon.
4. Add herbs and salt and pepper.
5. Bake in oven at 350 Celsius for approximately 30 minutes, until cooked, stirring once or twice while cooking. Serve and enjoy! :)
Friday, 8 April 2011
Slow Roasted Lamb - 5 points
I've never made lamb before, but with Easter coming up in a couple weeks, and having seen an episode of Barefoot Contessa, where she mades this roasted lamb, I felt inspired! It turned out so good, so it will definitely be on the menu for Easter!
What you need:
Leg of lamb
Olive oil
Salt
Pepper
Fresh rosemary
Fresh thyme
6 cloves of garlic
1/2 cup white wine
What to do:
1. Rub the lamb with a couple tablespoons of olive oil, and some salt and pepper.
3. Once the lamb is seared, remove from heat and add the wine (everything is better with wine, right?!.
4. Add garlic and 4-5 sprigs of thyme and rosemary to the pot, and its ready for the oven!
5. Cook for 3-4 hours at 300 Celsius. Its ready to come out when you can pull it apart with a fork. Enjoy!
Subscribe to:
Posts (Atom)